Introduction
Microsoft recently announced that Azure Elastic SAN has been made generally available. This blog article gives an overview of the service and how to deploy it.
Overview
Azure Elastic SAN (Storage Area Network) is a cloud-native service offered by Microsoft. Here’s an overview:
Purpose: Azure Elastic SAN is designed to optimise workloads and the integration between large scale databases and performance-intensive mission-critical applications.
Interoperability: It works with multiple types of compute resources such as Azure Virtual Machines, Azure VMware Solutions, and Azure Kubernetes Service.
Compatibility: Azure Elastic SAN volumes can connect to a wide variety of compute resources using the internet Small Computer Systems Interface (iSCSI) protocol.
Simplified Provisioning and Management: Elastic SAN simplifies deploying and managing storage at scale through grouping and policy enforcement.
Performance: With an Elastic SAN, it’s possible to scale your performance up to millions of IOPS, with double-digit GB/s throughput, and have single-digit millisecond latency.
Cost Optimization and Consolidation: Cost optimization can be achieved with Elastic SAN since you can increase your SAN storage in bulk.
Resources: Each Azure Elastic SAN has two internal resources: Volume groups and volumes.
Creating a SAN Instance
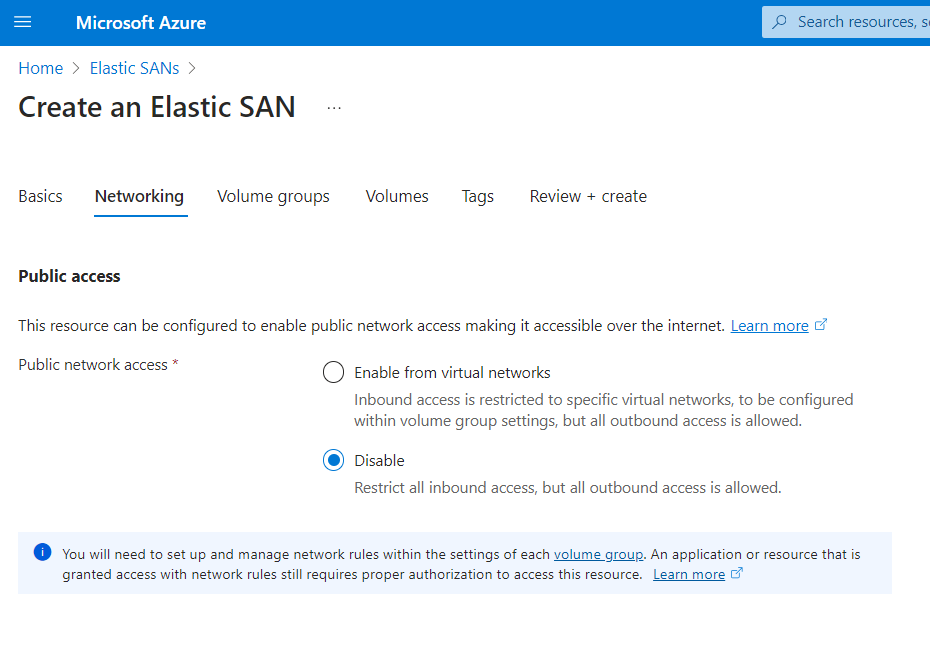
The following sections will walk you through the creation of an Azure Elastic SAN instance. During the creation of the Elastic SAN service, there is an option to configure allow access across the internet. However, for this deployment, we will use a private endpoint to restrict access to Elastic SAN from the internet.
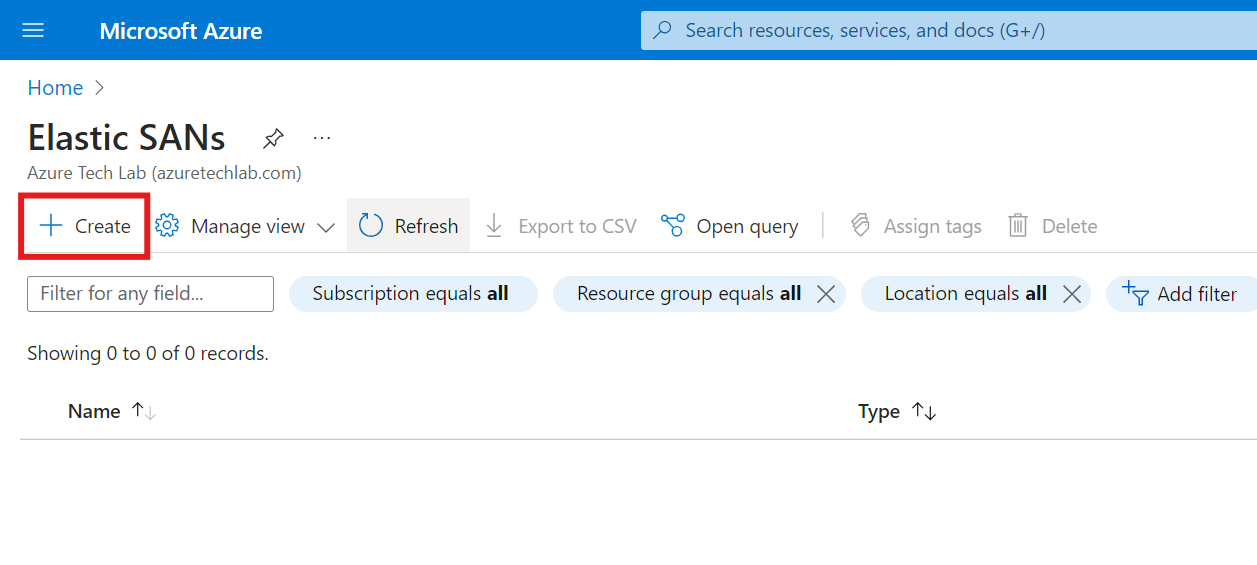
- Login to the Azure portal and browse for Elastic SAN
- On the Elastic SAN blade, click Create
- On the Basics page, complete the Projects and Instance details as well as the Elastic SAN resource provisioning. Once completed, click Next

- On the Networking page, choose whether or not you want to enable Public access. Exercise caution at this point, as enabling public access will make your Elastic SAN instance accessible over the Internet. Once completed, click Next
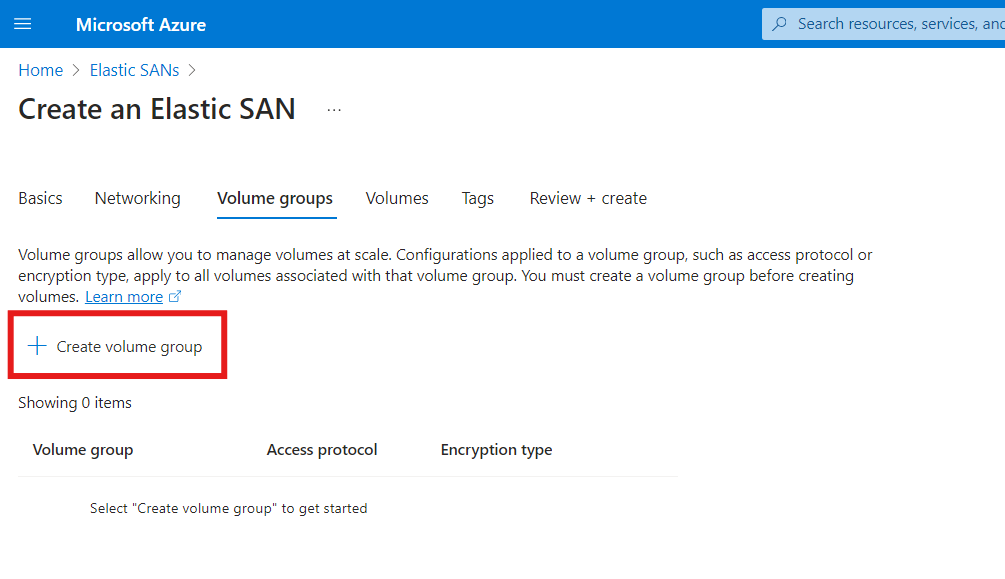
- On the Volume Groups page, click Create volume group.
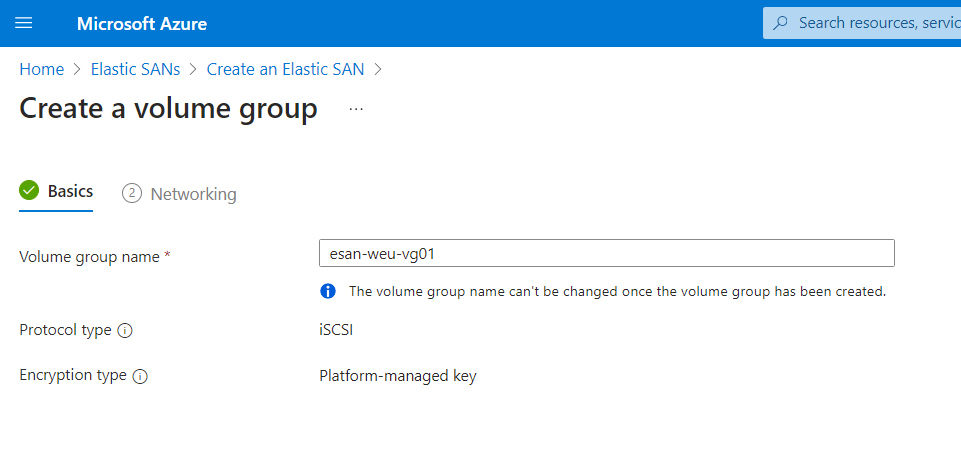
- On the volume group basics page, name your volume group.
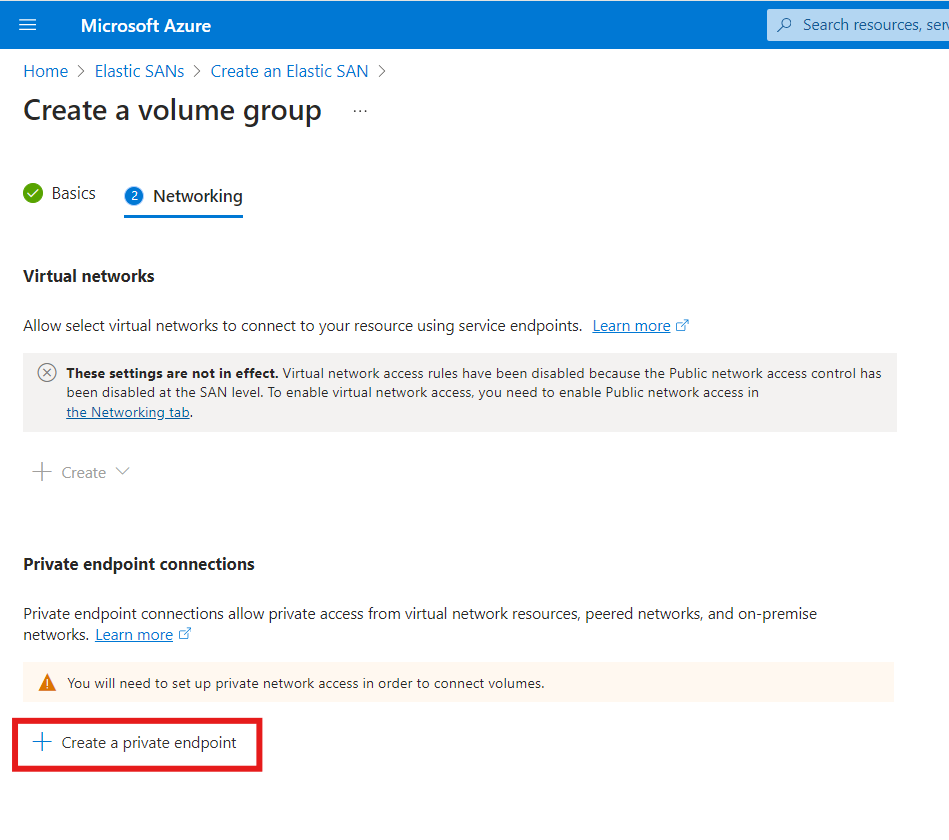
- On the volume group networking page, click Create a private endpoint
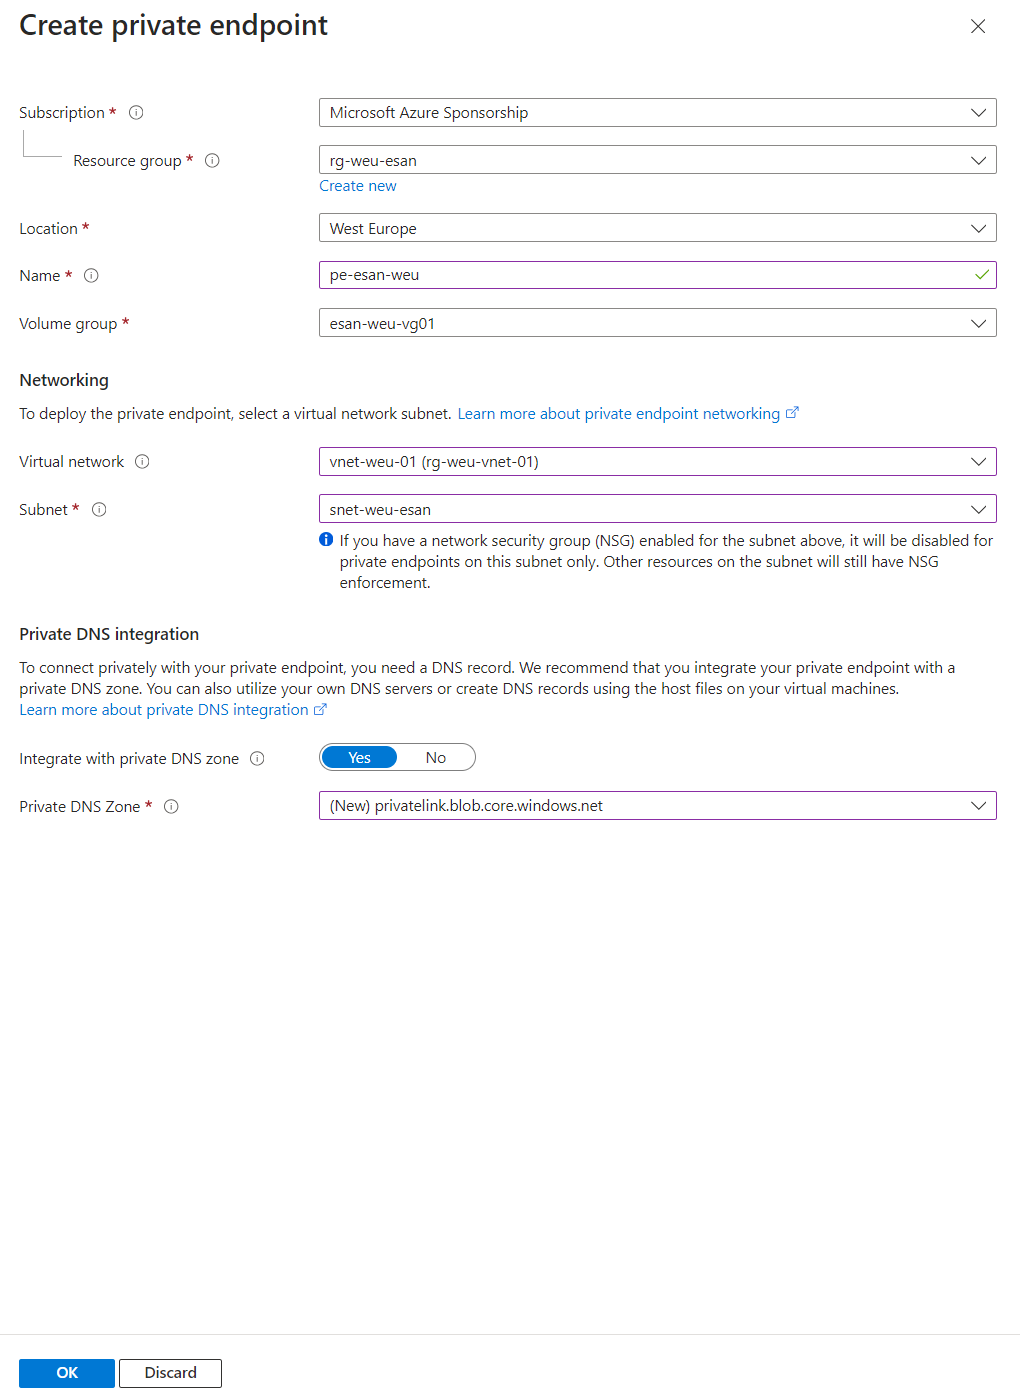
- On the Create private endpoint page, fill in the name and select the virtual network and subnet. You can also choose to integrate with private DNS. CLick OK
- On the next page, click Create
- Then, click Next
- On the Volume page, name your volume and choose its size (in GiB). Click Next

- On the Tags page, add your tags as appropriate.

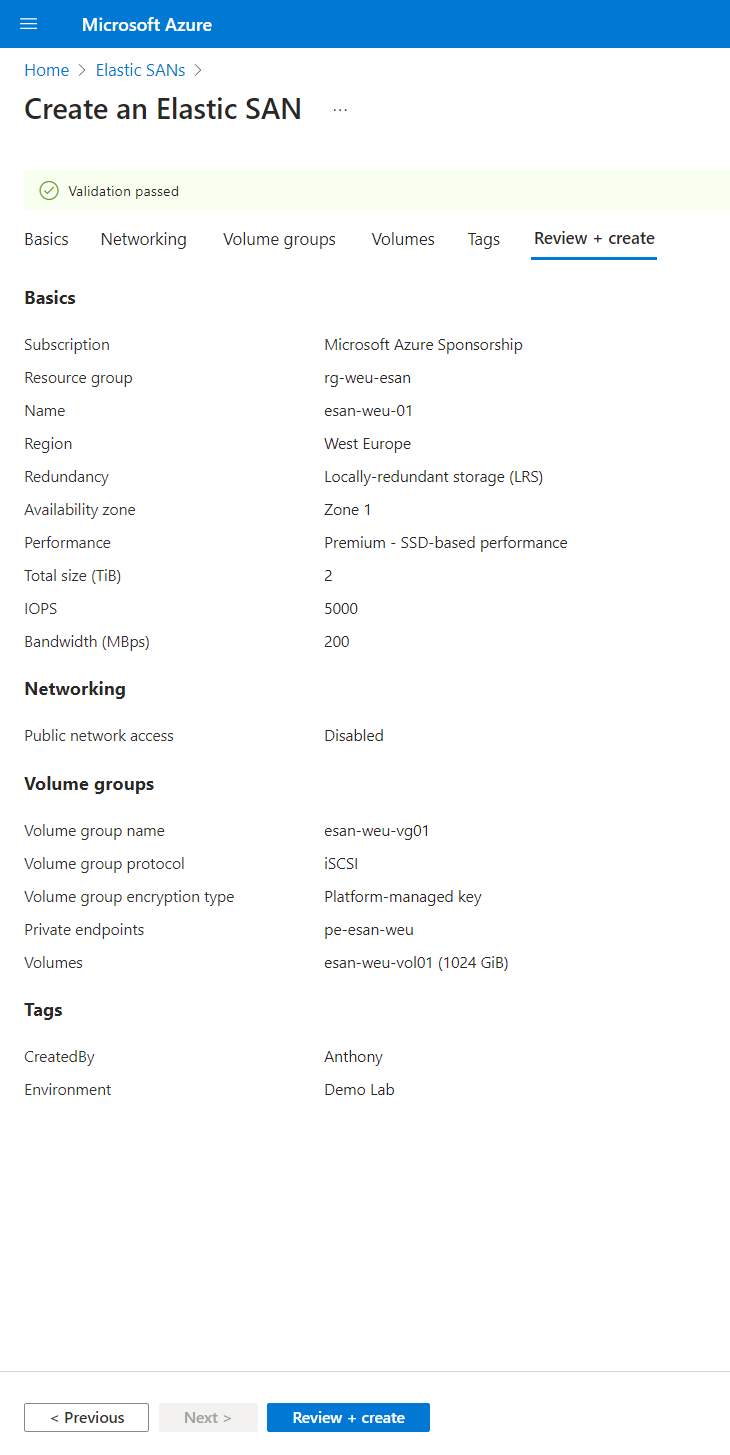
- Finally, click Review + Create
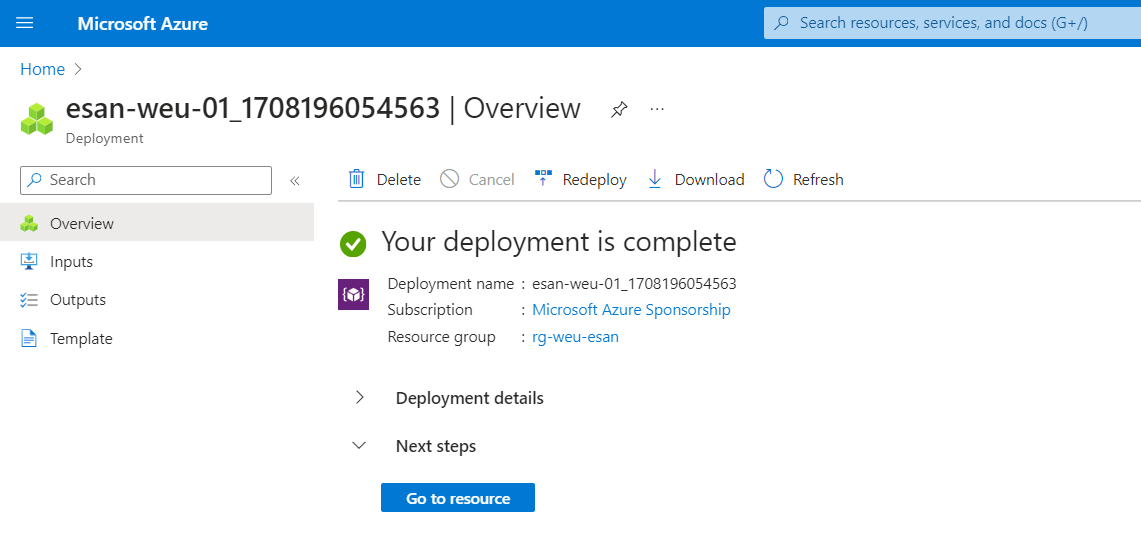
- That’s it, you’ve now successfully created your Elastic SAN instance.
Summary
Azure Elastic SAN (Storage Area Network) is a cloud-native service that offers a scalable, cost-effective, high-performance, and comprehensive storage solution for a range of compute options. It provides an end-to-end experience similar to on-premises SAN.
It extends storage support beyond Azure Virtual Machines to include Azure Kubernetes Service (AKS), Azure VMware Solution, cloud-native applications, and edge appliances through industry standard interface iSCSI protocols. It also offers high levels of resiliency without having to set up multiple deployments of SAN arrays and a replication policy.
So, what are you waiting for, get logged into Azure and have a go at setting up your own Elastic SAN instance 😊